How to create a new Web Form in Axapta
Step 1:
To create a new web form you need to add the data source in the Data source node of the web form.
(i.e. either use can use the existing table or create a new table in the AOT and use it in the web form data source)
Go to AOT à Web à Web Forms
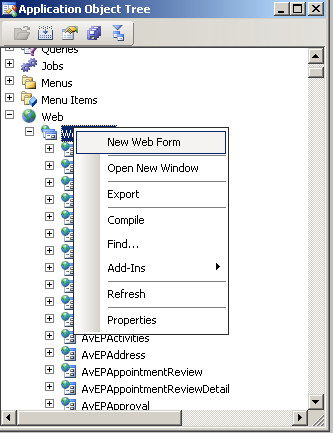
Create a new form as shown in the above screen shot and name it as per the naming convention.
Step 2:
Now add the data Source in the data source node of the form(if created new Table add the created table or if using the existing standard ax table add it).
In the Design node of the form, as per required add the Web group or web grid and the fields from the data source as required.

Step 3:
Once the Form is designed add the “Display Web Content” in the below path
AOT à Web à Web Content à Display, as shown in the below screen

Step 4:
Now Go to the EP site and create a web-part page as shown below…

Step 5:
Give the name for the Web part and then click create…

A web-part page with “EPExample.aspx” page will be created.
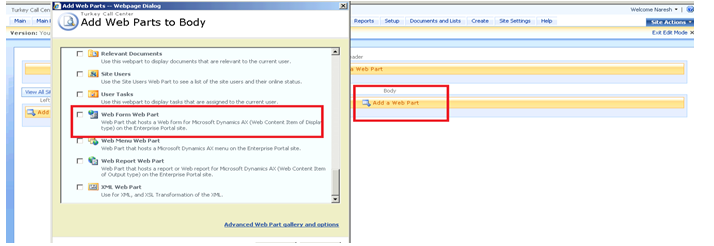
Then click on the Add Web part page as shown in the screen, a new window with control will be opened. From that window choose the “Web form Web part”.
Step 6:
After adding the” Web form Web part”, go to Modify shared web part ,over there attach the Web Content Display item to the created web part page and click OK as shown in the below screen

Step 7:
Again go back to
AOT à Web à Web Menu Items à URLs
Over there create a new URL and go to properties of that URL and the URL which we created for the Web form web part page in the EP as shown in the screen shot

Step 8:
Once finished with the URL, then right click on the created URL and click the Import Page, so it creates the page definition for it in the following path
AOT à Web à Web Files à Page Definitions àExample